Creative Landscapes, Exploring Long Exposure Photography

I grew up around art, music, and photography. In my life, I’ve explored them all, including painting. Off and on, I would “attempt to paint” but put it away because I felt the results weren’t great or because I couldn’t draw very well. Or the abstractions I was attempting to create didn’t work out. Ultimately, I gave up.
As a photographer, I have explored just about every genre, with the majority of images having sharp focus to highlight a story, a scene, or a moment in time. But the artist’s soul within, always pops into my brain and creative process, pushing me to experiment with my camera and the tools available to me.
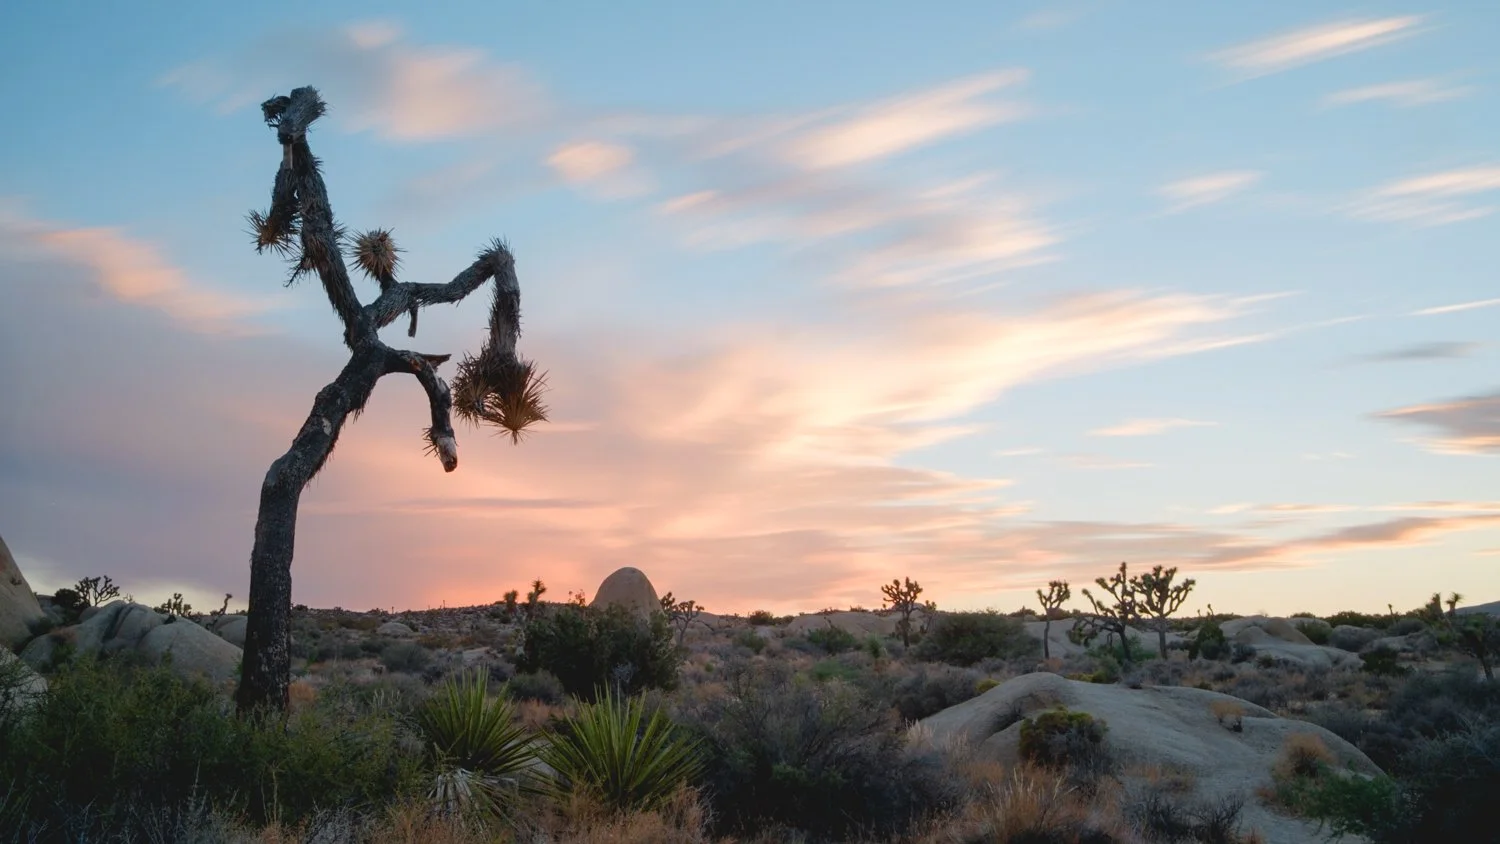
One creative expression is the idea of displaying movement, of some kind, in a still image. There are a couple of techniques I explore with this thought in mind, Long Exposure Photography and Intentional Camera Movement.
For me, creating long exposures shows motion blur, either of a moving subject like a car, a person, or a body of water. In some instances I will use a tripod to stabilize my camera, this provides some elements in the scene to be sharp, while others may blur. In many instances, I will hand-hold my camera and lean into the in-camera image stabilization (IBIS) for some sharpness, at the slower shutter speeds, or intentionally move the camera or lens to create movement or abstraction. Let’s break down the camera settings, this is a manual process to truly achieve specific results with my camera.
ISO
I set my ISO manually, auto ISO can be great, but I like to encourage people to get to know the range of the ISO on their camera, so they know when there may be too much noise in an image.
Based on the light, these are my general ISO settings:
Sunny, no clouds - 100-200
Sunny, some clouds - 100 - 400
Overcast - 200 - 800
Night - 800 - 6400
Aperture
I have some bad habits when it comes to aperture, for a lot of my work I love to use more open apertures like f/1.2, f/1.4, or f/2, but I am working on breaking this habit, by capturing the same scenes with a couple of different apertures. This gives me more options for later use.
However, when doing long exposures, we will often need to close down our aperture to f/8, f/11, f/16, etc… this isn’t to make the image sharper, necessarily, but to take away light so that we can start to achieve slower shutter speeds.
Typically for long exposure, I will set my ISO to 160 to start (that’s the native ISO of my go-to camera, the Fujifilm X-T4), and then close down my aperture to f/16. These two settings take away light so that I can add light back in with shutter speed.
Shutter Speed
With the aforementioned ISO and aperture settings, on a sunny day or partly sunny day, this should give me a shutter speed of around 1/125th of a second. The shutter speed will vary, but I feel like consistently that’s about what I’ve seen as I’m dialing in things. 1/125 of a second is still pretty fast, so the results will often freeze the action of a scene.
This is where Neutral Density filters come into the mix. An ND filter will “fool the camera into thinking it’s darker”. It’s not a trick of course, it’s a dark piece of glass over the lens, removing even more light.
Once you have added the filter, you will be able to adjust your shutter speed accordingly. For example, if your shutter speed is at 1/125 of a second and you add a 10-stop ND filter, the new shutter speed would be 1/8th of a second.
ND Filters
ND filters come in a variety of options. You can get variable ND Filters, typically in a range of 1-10 stops. 1 stop of ND won’t get you too far on a sunny day, however, a 10-stop on a sunny day can start to get interesting. 15-16 stops are even more interesting.
I have screw-on filters, and I have drop-in filters. Lately, I have been using a 10-stop screw-in filter to explore some intentional camera movement when I travel light (i.e. no tripod). When I travel I use the drop-in filters, because I have a lot more options of removing light with the kit I have.
What do I have specifically?
When I’m traveling with the tripod and more gear, I use the LEE Filters Long Exposure Kit. This kit includes a holder, a 6-stop (little stopper), a 10-stop (big stopper), as well as a 2-stop ND grad. I will generally stack 2 of these filters together to achieve longer exposures.
For example, this first shot has no filters. You can see the water looks a little choppy.

ISO 200 | f/16 | 1/20th of a second
This was captured as the sun was setting, so in this instance, I used a 10-Stop (Big Stopper) and I added the graduated filter to just affect the sky.
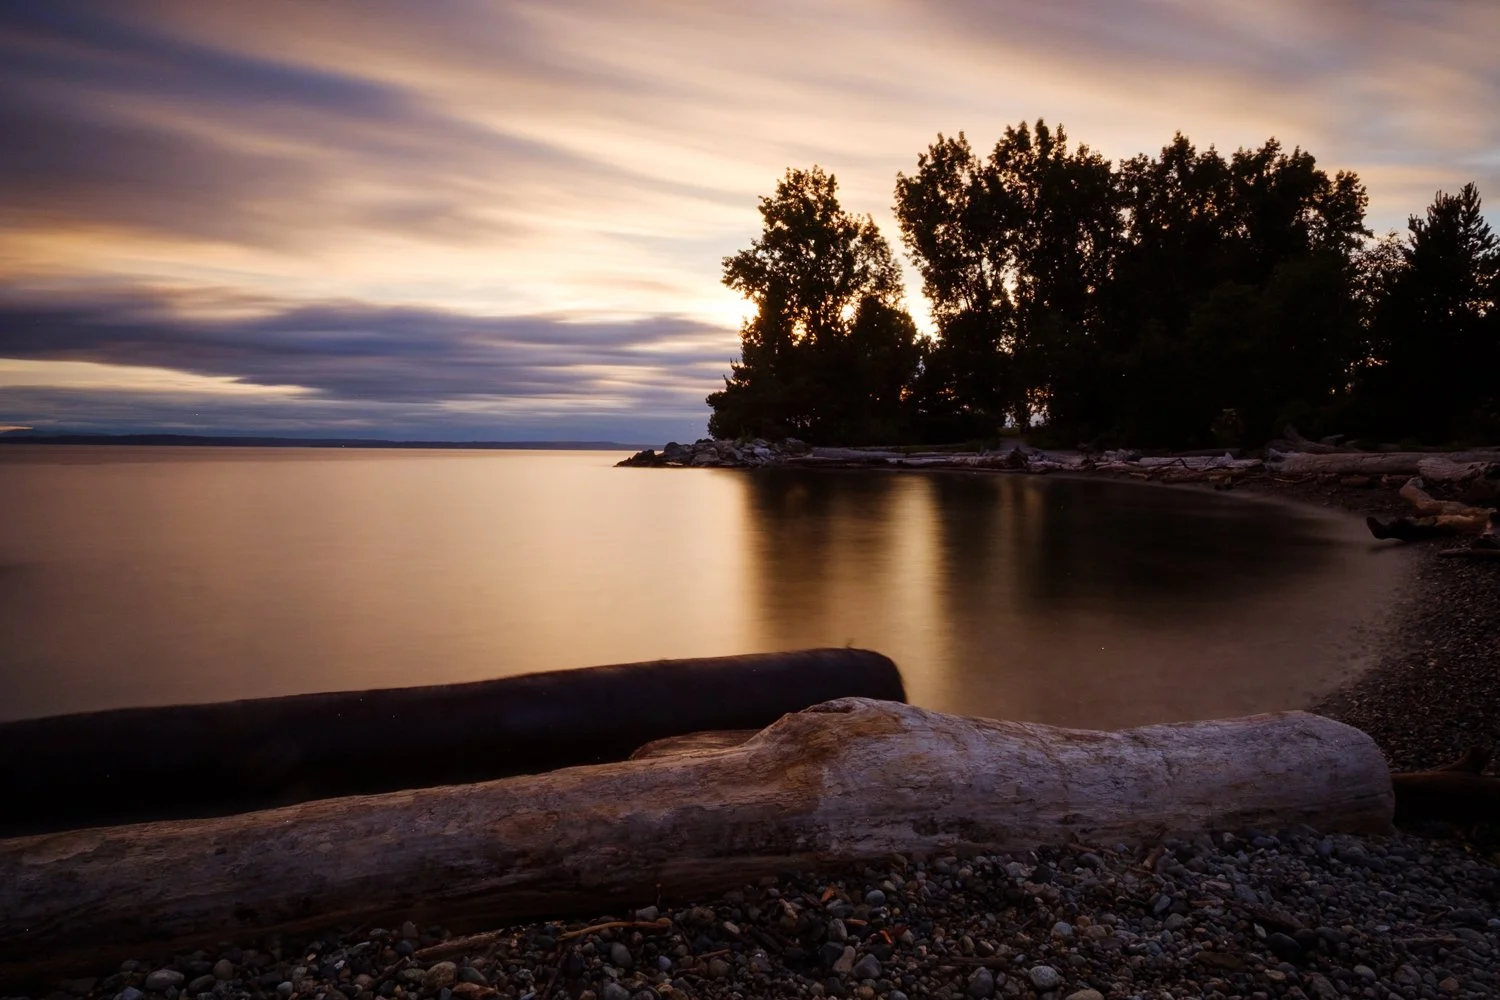
ISO 200 | f/16 | 2 Minutes
I use the screw-in filters on just about every camera I own, and often at times when I want to travel very light. Brands I use include Breakthrough Photography, Hoya, and K&F Concept.
One of the challenges with the ND filters is a potential color cast. The color cast issue is relatively easily resolved in programs like Adobe Lightroom.
Another issue that can occur is light refraction or odd reflections within the final image. Ways to combat this are to wrap something like a dark cloth around the front of the lens, being careful not to cover the lens. As well, as covering your viewfinder, especially if using a DSLR.

GEAR RECOMMENDATIONS
CAMERA
Whatever camera you already own may be great to use for this style of photography. The main consideration is the option to use a shutter speed slower than 30 seconds. This may require a shutter release cable, though many cameras on the market today may not require it.
I mostly use my Fujifilm X-T4 for these techniques because it’s small, and has IBIS.
LENS
My go-to focal lengths for this style of photography include wider lenses like the Fujifilm 14mm f/2.8 or 23mm f/2. For those of you on full-frame cameras, consider a 20mm or 35mm. I tend to prefer wide-angle lenses for landscapes, to show more of the scene.
I also love a 35mm f/1.4 (from Fujifilm), or a 50mm f/1.8 from Nikon (or Canon or Sony), to capture street scenes with some motion.
TRIPOD
I’d suggest any exposure times of more than 1-2 seconds, a tripod is required to have some of the elements of the scene in focus, like an anchoring element. If your camera doesn’t have IBIS (in-body image stabilization), I’d say anything under 1/125 would be best captured on a tripod.
A good tripod is worth its weight in gold. Why spend thousands of dollars on cameras and lenses only to have it blown over by the smallest breeze and break?
Invest at least a few hundred dollars in a tripod that is designed and rated to hold your heaviest camera and lens combination.
My go-to brand is 3 Legged Thing out of the UK. I’ve been using their tripods since 2014, and love them. The team at 3 Legged Thing are innovative, sharp, fun, and wonderful people.
My tripod of choice from 3 Legged Thing is Bucky, strong, yet compact. Great for travel and for use with any of my cameras, from the smaller Fujifilm X-T4, to a 4x5 film camera.
FILTERS
I love the setup from LEE Filters, but if that doesn’t quite fit the budget, look at brands like Breakthrough Photography, B+W, and Hoya. If the budget is super lean right now, check out K&F Concept.
The thing with higher-end filters is typically better image quality. Sometimes a $20 filter may reduce sharpness or overall results. So if you get into this technique and want to sell prints or make books, higher quality filters would be worth the investment.